In the previous article, you have learned about the Entity Framework, ORM, and how to Connect your SQL database to MVC application using Entity framework.
In this article, you will learn how to perform CRUD (Create Read Update Delete) operations using the Entity Data Model (DB First Approach) on the data of this project.
This article will be helpful to beginners and students who are learning MVC.
Pre-requisites
You need to create ASP.NET MVC Project(You can refer our Create Asp .Net MVC application article for that), Or you can add this into the existing project also A SQL server Installed where you can create a database.
A Database created on the SQL server.
Connect your Application with the SQL database with entity framework (you can refer to our previous article for that).
CRUD Operation Using Entity Data Model
Step1: Display Records
Create a New controller name it appropriately, Then add a Method called Index or you can a method that already exists.
Create an Entity object in the controller as below so you can use that to perform any operation in all the methods.
In the Index method, we will code to display the list of data of the table in the table format on the web page.
Add this code given below into the controller you have added.
Right-click on the method and add a new view and replace the below code to that view.
public class HomeController : Controller
{
      PersonEntities dbContext = new PersonEntities();
      public ActionResult Index()
      {
         PersonEntities entityModel = new PersonEntities();
          var persons = entityModel.PersonDetails.ToList();
          return View(persons);
      }
}
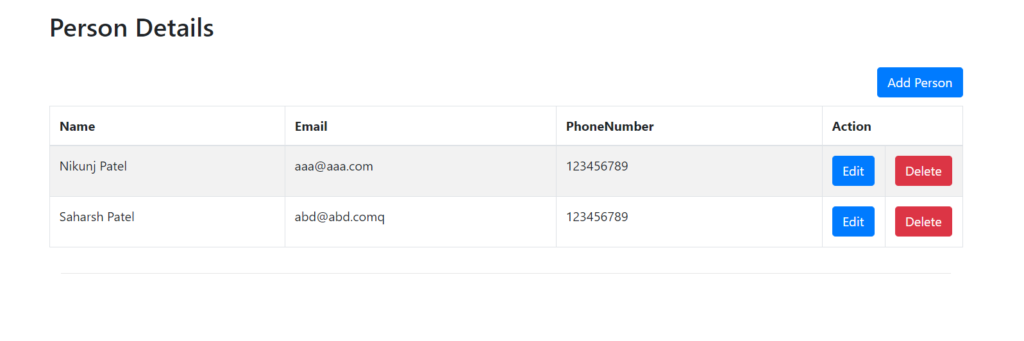
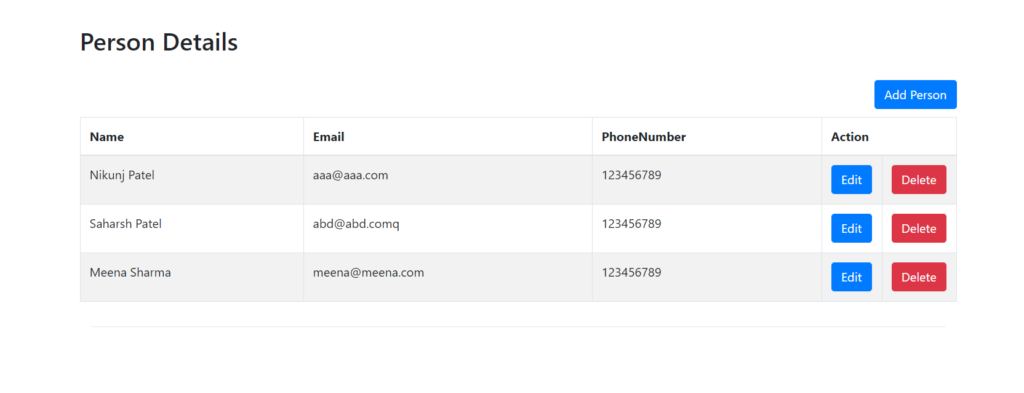
The above code is to display the data that is passed from the controller to this view in the table format so that we can perform add, edit, delete, and display operation.
When you hit the run button you will see the output as given in the below picture.
Step2: Add/Edit Record
In the same controller add the new method named “Manage”, In this method, we will write the code to add the new person details, and also if you want to edit a particular record pass the id of that record in the parameters of the method.
So you can get the record of that particular id from the database with the entity object and pass that data into the model so you can edit it in the view page. Otherwise, you can pass the empty object of the model
To save this form make another action, I have made with the same name as previous one but I have made it HttpPost type, and replaced the code of add and edit the person details
Replace the code of method in the controller as per the below code given.
public ActionResult Manage(int Id=0)
{
    PersonDetail model = new PersonDetail();
    if (Id > 0)
    {
        model = dbContext.PersonDetails.FirstOrDefault(x => x.Id == Id);
    }
    return View(model);
}

public ActionResult Manage(PersonDetail model)
{
    PersonDetail personData = new PersonDetail();
    if (model.Id > 0)
    {
        personData = dbContext.PersonDetails.FirstOrDefault(x => x.Id == model.Id);
    }
    personData.FirstName = model.FirstName;
    personData.LastName = model.LastName;
    personData.Email = model.Email;
    personData.PhoneNumber = model.PhoneNumber;
    personData.UpdatedDate = DateTime.Now;
    if (personData.Id == 0)
    {
        personData.CreatedDate = DateTime.Now;
        dbContext.PersonDetails.Add(personData);
    }
    dbContext.SaveChanges();
    return RedirectToAction("Index");
}
Right-click on the First method and add a new view as per the action name and replace the below code.
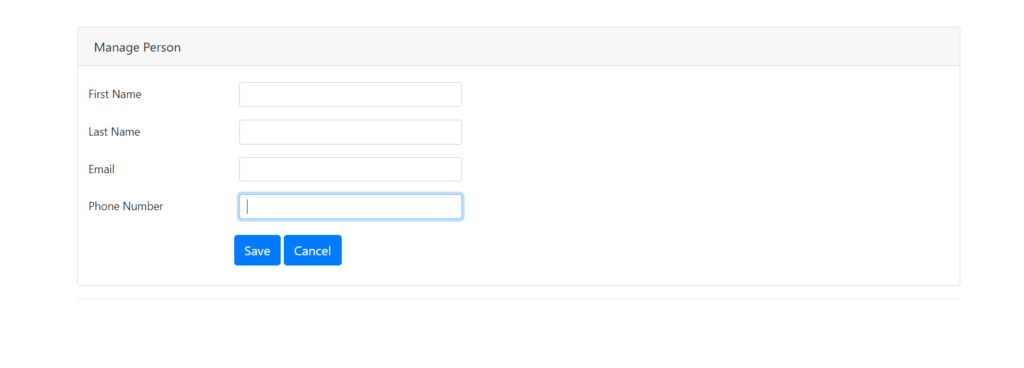
The code contains a field of personal details, It’s to add or edits the person details.
When you run the Code it will open a form like below given image
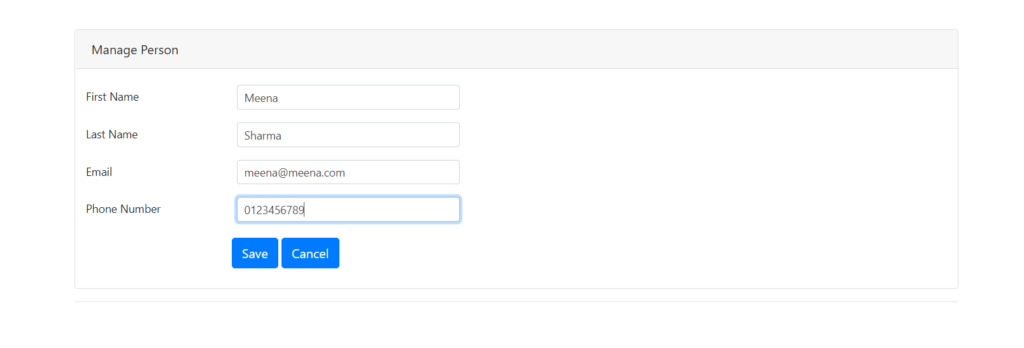
So when you fill the above form and hit the save button it will save that record in the database and display it to the list page as shown below
You can edit the record same way as we added. there is also an edit button given on the list page to edit that particular record.
Step3: Delete Record
To delete the record from the database, create another action called “Delete”. In this action write code to delete that particular record of id that is passed in the parameter of the method.
Replace the Code of Delete action as shown below.
[HttpGet]
public ActionResult Delete(int Id)
{
var personData = dbContext.PersonDetails.FirstOrDefault(x => x.Id == Id);
if (personData != null) {
dbContext.PersonDetails.Remove(personData);
dbContext.SaveChanges();
}
return RedirectToAction("Index");
}
On the list page of person detail, there is a delete button given for every record. Click on that button, it will redirect you to this above-given method with the id of that particular record, SO we can find that record in the database and delete it. After deleting the record it will redirect you to the List page again and you can see the change in the below-given image.
I hope this article will help you to Perform CRUD operations with the Entity data model in the MVC application. we will be happy to help you if you have any issues or queries. Comment your suggestions and issues and we will try to resolve it.