Create First ASP.NET MVC Application
In this article, you will see how to create MVC web application step by step using a visual studio and you will get the introduction of the basic building block of ASP.NET MVC application.
Setup Development Environment
You can develop an ASP.NET MVC application with the appropriate version of Visual Studio and .NET framework. Here, we will use Visual Studio 2019 and .NET Framework 4.7.2 to create our first MVC application.
You can find the latest version of Visual Studio from here. read brief documentation for visual studio is also available here. find the latest .NET framework is available here, and an official document about the .NET framework is also available here.
Create Sample MVC Application
After installation of visual studio. Open visual studio and click on the file menu, select “project” from a new option. File > New > Project…, you also create a new MVC.NET web application project from the bottom right corner.
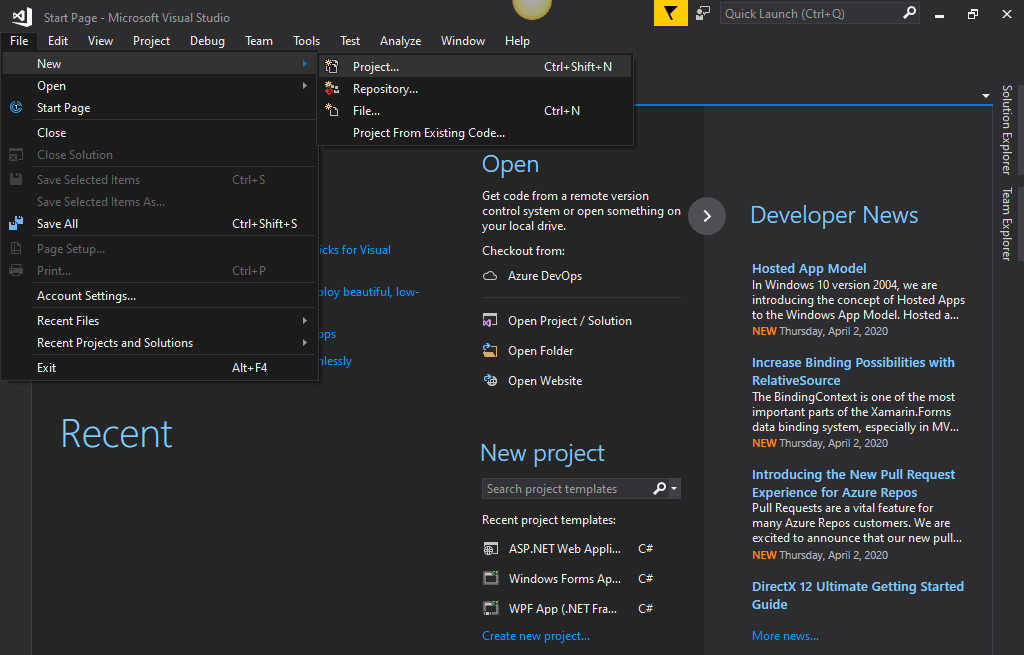
Microsoft visual studio provides a large number of development environments with various types of applications such as desktop applications, mobile applications, web applications, etc.
After a click on a new project, you will be shown a popup that will provide the option for the project name, project directory, application type, etc. as per shown in the below image Microsoft provides many languages and framework supports, as well you can create various platform application.
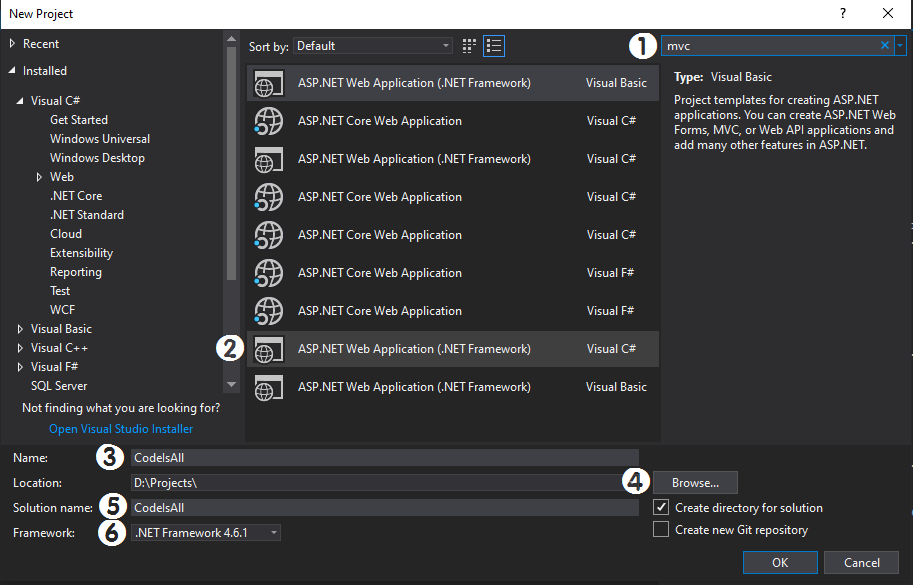
- Type MVC in the upper right corner search box, it will sort and display available MVC projects. you can also manually find ASP.NET Web Application.
- Click on ASP.NET Web Application (.NET Framework) that will use for creating an application using .net framework and visual C#.
- Enter your project or application name.
- Select your project destination path using a click on the browse button.
- This indicates the solution name, by default name and solution name both are the same when you enter “name” automatically it takes as a solution name but you can change if you want.
- you can change .NET framework form here.
- Then click on ok button
After the configuration project, the next step will be the selection of a template. using ASP.NET web application you will be able to create many types of applications like web forms, web APIs, MVC, single-page applications, etc.
When you select a specific template, the visual studio provides a description of that template on the right side. You can change the authentication by clicking on the Change button. You can select appropriate authentication mode for your application. Here we have kept this to No Authentication.
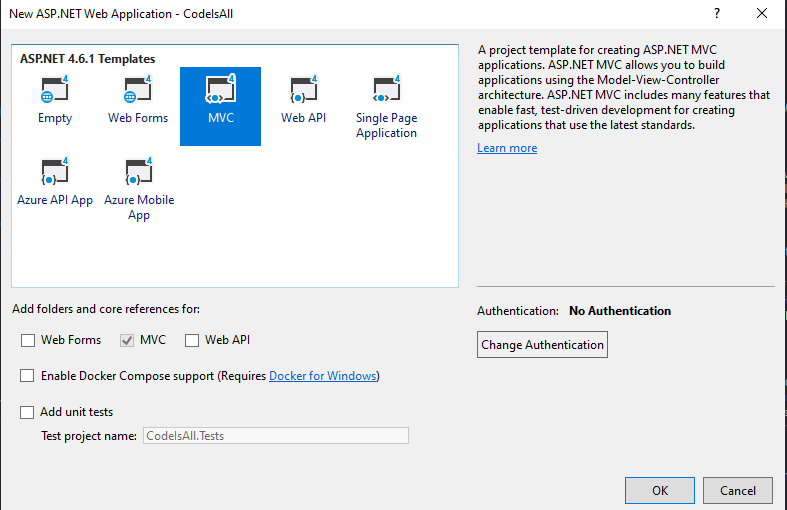
Select the MVC template and click ok. it takes some time to create a project. you can get sample controllers and views by default created as you selected the MVC template. here is below image shows the first page of the created project
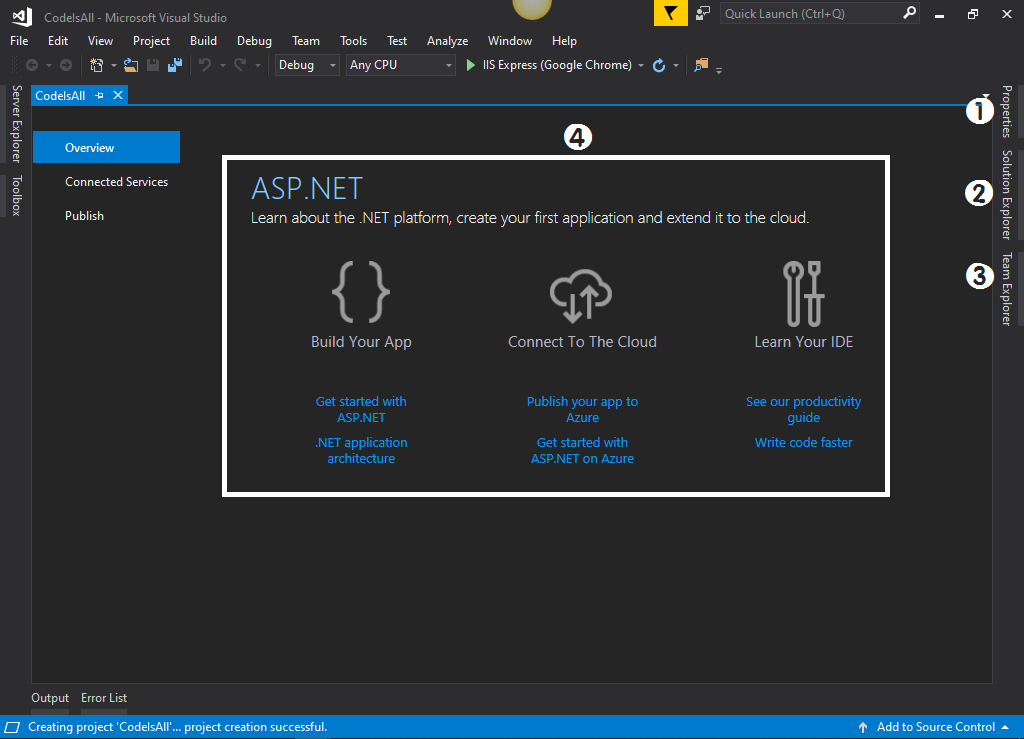
Visual Studio is an IDE (Integrated Development Environment) so it integrated with many other tools and functionality.
- Property window: it provides the property of specifics selected components like project or project components.
- Solution Explorer: provides all files and components of projects, you can add or remove new files or components from right-clicking on the specific folder in solution explorer.
- Team Explorer: it’s an inbuilt function of visual studio, and it provides a version control facility. you can use Git, GitLab or Microsoft’s own team foundation server to manage version control for your project.
- this is the online documentation for how you getting started with ASP.NET application, publish an application to the azure server, learn about visual studio IDE.
The below image can more describe the solution explorer and project structure. MVC.NET web application follows the model view controller pattern. you can learn more about MVC architecture from here.
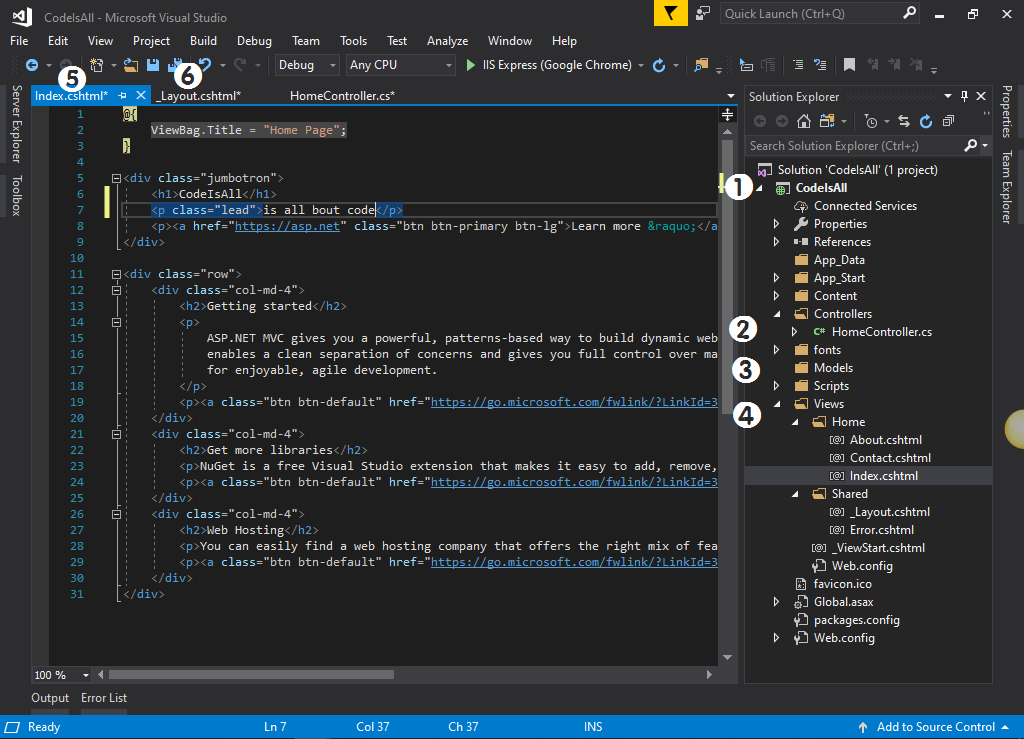
- project name: it contains the whole project structure, you can add multiple projects in a single solution and use its entire solution.
- Controller: it contains logics of how to display webpages or views into the web browser. a controller is one type of class and written into C#.
- Model: it provides the collection of models that you can use into the entire application to manage your logic for your application, basically its use for get and set values.
- Views: it contains views file in form of cshtml file, basically it is one type of HTML but you can write C# code also. you can see the file structure in the left side panel.
- this is an index file or an index page and its use for displaying the home page in this web application. I’m changing some header and its paragraph, you can find it into output.
- the layout file is mainly used for providing header like menu and footer for the entire application, it has the same structure as the index file.
Now the project is ready to run, you can run it via the play button in the menu-bar or you can simply press the F5 key to run the project. here is output of the project.

Hope this article will help you to create a basic MVC.NET web application. we are to help you if you have any issues or problems. comments on your suggestions and issues we try to resolve it.