Android Layouts
Android Linear Layout
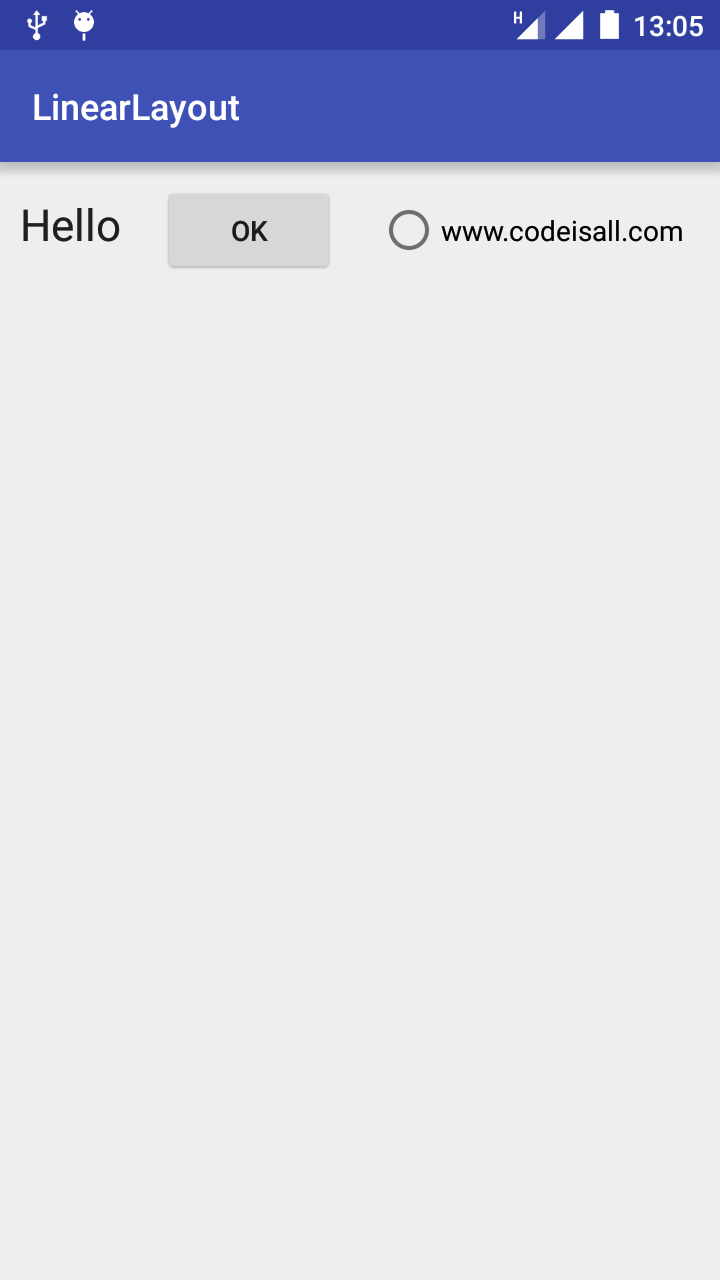
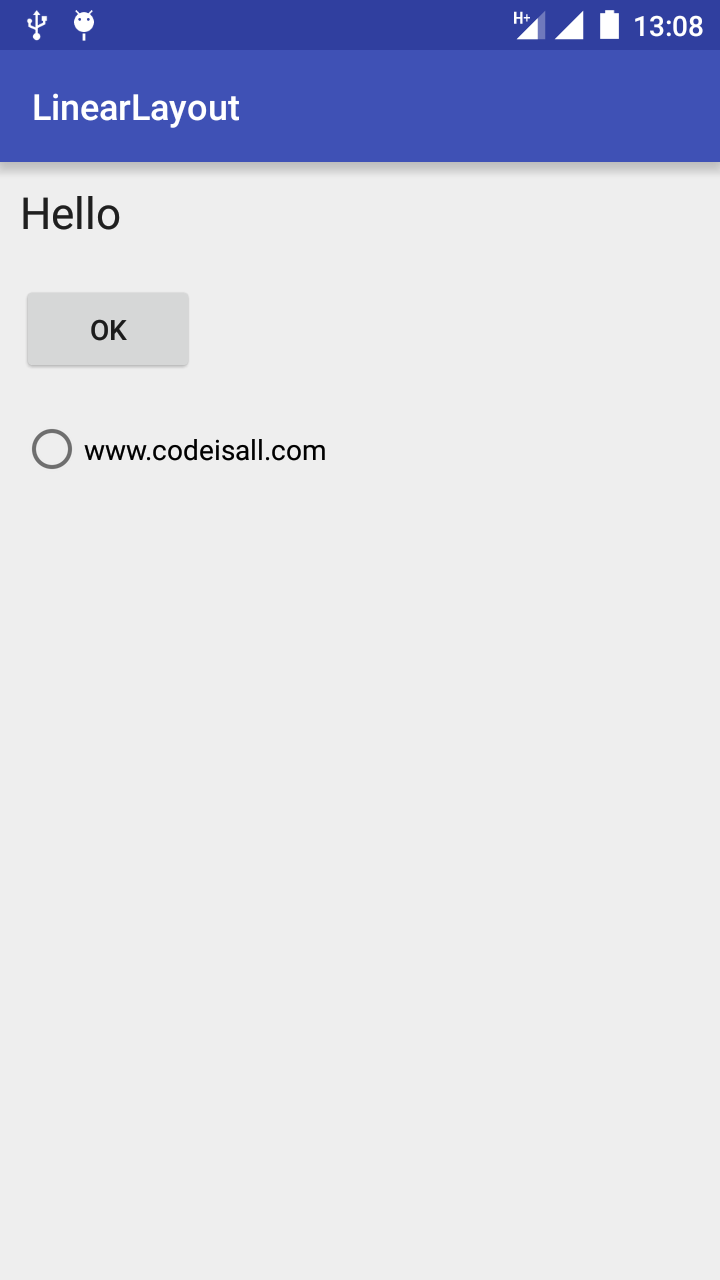
Linear layout arranges all GUI objects in a single direction either horizontally or vertically. It depends on how we define the orientation attribute. All children are arranged one by one. Because of that, a vertical list will only have one child per row, while horizontal list has multiple children in a row.
Attributes :
android:gravity – Defines the position of contents in x and y-axes. Values: left, right, top, bottom, center etc.
android:orientation – It defines a direction of arrangements of GUI objects. The default value is horizontal. Values: horizontal, vertical.
android:margin – Used to set margin in all alignments like left, right, top, bottom.
you can add android:orientation attribute to your LinearLayout. If you want to get all GUI objects in a row then a value for orientation must be horizontal. And if you want to get all GUI objects in a column then the value for orientation must be vertical. You can also modify orientation at the run time. In order to do that you can use setOrientation().
Example Of Android Linear Layout
<?xml version="1.0" encoding="utf-8"?>

<LinearLayout xmlns:android="http://schemas.android.com/apk/res/android"
     android:layout_width="fill_parent"
     android:layout_height="fill_parent"
     android:orientation="horizontal">

     <TextView
         android:layout_width="wrap_content"
         android:layout_height="wrap_content"
         android:textAppearance="?android:attr/textAppearanceLarge"
         android:id="@+id/textView"
         android:text="Hello"
         android:layout_margin="10dp"/>

     <Button
         android:layout_width="wrap_content"
         android:layout_height="wrap_content"
         android:text="OK"
         android:id="@+id/button"
         android:layout_margin="10dp"/>

     <RadioButton
         android:layout_width="wrap_content"
         android:layout_height="wrap_content"
         android:text="codeisall.com"
         android:id="@+id/radioButton"
         android:layout_margin="10dp"
         android:checked="false" />

</LinearLayout>
Outputs For Both Horizontal & Vertical Orientation.
Android Relative Layout
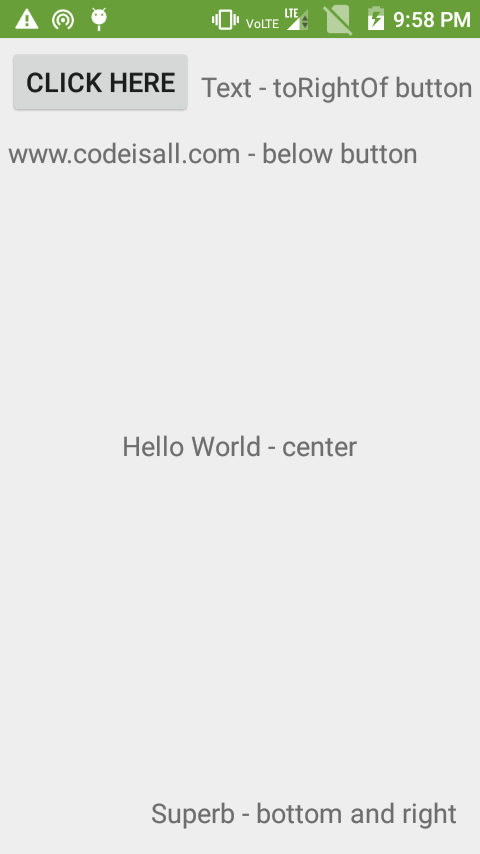
With the help of Android relative layout, GUI objects specify their position relative to each other. All GUI objects are rendered as per given the order. For example, suppose we arrange the first element in the center of the screen, then other elements automatically aligned themselves to that element will be aligned relative to screen center. Android Relative layout puts widgets based on their relationship to other widgets in the container and the parent container.
Attributes :
android:layout_alignParentTop : The value must be true or false. If true then GUI object’s top should align with the top of the container.
android:layout_ alignParentBottom – The value must be true or false. If true then GUI object’s bottom should align with the bottom of the container.
android:layout_alignParentLeft – The value must be true or false. If true then GUI object’s left side should align with the left side of the container.
android:layout_ alignParentRight – The value must be true or false. If true then GUI object’s right side should align with the right side of the container.
android:layout_above – Indicates that the GUI object should be placed above the GUI object referenced in the property.
android:layout_below – Indicates that the GUI object should be placed below the GUI object referenced in the property.
android:layout_toLeftOf – Defines that the GUI object should be placed to the left of the widgets referenced in the property.
android:layout_toRightOf – Defines that the GUI object should be placed to the right of the widgets referenced in the property.
Example Of Android Relative Layout
<?xml version="1.0" encoding="utf-8"?>
<RelativeLayout xmlns:android="http://schemas.android.com/apk/res/android"
    android:layout_width="match_parent"
    android:layout_height="match_parent">

    <Button
        android:layout_width="wrap_content"
        android:layout_height="wrap_content"
        android:text="Click Here"
        android:textSize="18dp"
        android:layout_margin="5dp"
        android:id="@+id/btn1"/>

    <TextView
        android:layout_width="wrap_content"
        android:layout_height="wrap_content"
        android:textSize="18dp"
        android:text="Text - toRightOf button"
        android:layout_toRightOf="@+id/btn1"
        android:layout_marginTop="20dp"/>

    <TextView
        android:layout_width="wrap_content"
        android:layout_height="wrap_content"
        android:textSize="18dp"
        android:text="codeisall.com - below button"
        android:layout_margin="5dp"
        android:layout_below="@+id/btn1"/>

    <TextView
        android:layout_width="wrap_content"
        android:layout_height="wrap_content"
        android:textSize="18dp"
        android:text="Hello World - center"
        android:layout_centerInParent="true"/>

    <TextView
        android:layout_width="wrap_content"
        android:layout_height="wrap_content"
        android:textSize="18dp"
        android:text="Superb - bottom and right"
        android:layout_alignParentBottom="true"
        android:layout_alignParentRight="true"
        android:layout_margin="15dp"/>

</RelativeLayout>
Output
Android Frame Layout
Android Frame layout basically a blank space on the screen. Later you can fill with the single GUI object. It means frame layout holds only one child view. All child elements of the frame layout are arranged to the top left corner of the screen, you can not specify a particular location for a child view.
Example Of Android Frame Layout
<?xml version="1.0" encoding="utf-8"?>
 <FrameLayout xmlns:android="http://schemas.android.com/apk/res/android"
     android:layout_width="match_parent"
     android:layout_height="match_parent">

     <ImageView
         android:layout_width="150dp"
         android:layout_height="150dp"
         android:src="@drawable/logo"/>
     <TextView
         android:layout_width="wrap_content"
         android:layout_height="wrap_content"
         android:id="@+id/tv1"
         android:text="Code Is All"
         android:layout_marginTop="90dp"
         android:layout_marginLeft="40dp"/>

 </FrameLayout>
Output

Android Grid View
Android Grid View displays items in two-dimensional scrolling grid with rows and columns. Items in the grid view are automatically inserted to the layout using ListAdapter.
Attributes:
android:id – Unique id
android:columnWidth – Defines width for each column.
android:horizontalSpacing – Defines the default horizontal spacing between columns.
android:verticalSpacing – Defines the default vertical spacing between rows.
Example Of Android Grid View
activity_main.xml
<?xml version="1.0" encoding="utf-8"?>
 <GridView xmlns:android="http://schemas.android.com/apk/res/android"
     android:id="@+id/gridView1"
     android:numColumns="auto_fit"
     android:gravity="center"
     android:columnWidth="50dp"
     android:stretchMode="columnWidth"
     android:layout_width="fill_parent"
     android:layout_height="fill_parent" >

 </GridView>
MainActivity.java
package com.chirag.gridview;

 import android.app.Activity;
 import android.os.Bundle;
 import android.widget.AdapterView;
 import android.widget.ArrayAdapter;
 import android.widget.GridView;
 import android.widget.TextView;
 import android.widget.Toast;
 import android.view.View;
 import android.widget.AdapterView.OnItemClickListener;

 public class MainActivity extends Activity {

     GridView grid;

     static final String[] letters = new String[] {
             "A", "B", "C", "D", "E",
             "F", "G", "H", "I", "J",
             "K", "L", "M", "N", "O",
             "P", "Q", "R", "S", "T",
             "U", "V", "W", "X", "Y", "Z"};

     @Override
     public void onCreate(Bundle savedInstanceState) {
         super.onCreate(savedInstanceState);

         setContentView(R.layout.activity_main);

         grid = (GridView) findViewById(R.id.gridView1);

         ArrayAdapter adapter = new ArrayAdapter(this, android.R.layout.simple_list_item_1, letters);

         grid.setAdapter(adapter);

         grid.setOnItemClickListener(new OnItemClickListener() {
             public void onItemClick(AdapterView parent, View v, int position, long id) {
                 Toast.makeText(getApplicationContext(),
                         ((TextView) v).getText(), Toast.LENGTH_SHORT).show();
             }
         });

     }

 }
Output

Android Table Layout
Android Table layout arranges its GUI objects into rows and columns. Child views of a table layout are TableRow objects. One TableRow defines a single row in a table and each row has any number of columns. Each cell holds one View object. Android Table-layout does not display borders.
Example Of Android Grid View
<?xml version="1.0" encoding="utf-8"?>
 <TableLayout xmlns:android="http://schemas.android.com/apk/res/android"
     android:layout_width="fill_parent"
     android:layout_height="fill_parent"
     android:stretchColumns="1">

     <TableRow>

         <TextView
             android:text="Website Name"
             android:padding="10dip"
             android:textColor="#FFFF2F00"/>

         <TextView
             android:text="Code Is All"
             android:gravity="left"
             android:padding="10dip"
             android:textColor="#FF0800FF"/>

     </TableRow>

     <TableRow>

         <TextView
             android:text="Website URL"
             android:textColor="#FFFF2F00"
             android:padding="10dip" />

         <TextView
         android:text="https://codeisall.com"
         android:gravity="left"
         android:padding="10dip"
         android:textColor="#FF0800FF"/>

     </TableRow>

 </TableLayout>
Output